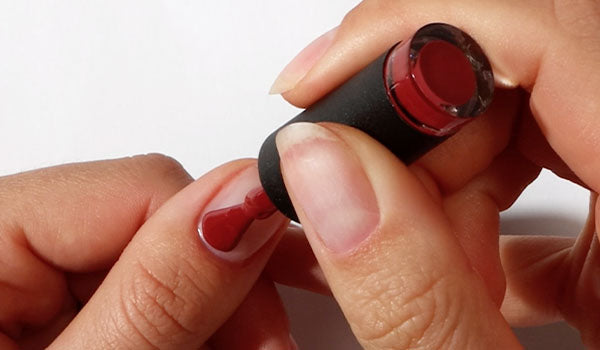
Free NZ shipping for orders $100+

Shop with Afterpay, Laybuy & Zip

UV/LED Gel Nail Lamp User Guide

  1. Remove the Gelous UV/LED Gel Nail Lamp and DC Adaptor from the packaging.
  2. Remove the blue film on the base plate and the clear film over the timer.
  3. Connect the DC Adaptor.
  4. Plug the DC Adaptor into a switched off power point.
  5. Switch the power point on once the DC Adaptor is plugged in. Do not remove and insert the DC Adaptor while the power point is turned on, as this could cause sparking and/or short-circuiting.
  6. After painting your nails with each coat of the Gel Nail Polish, place your hand or foot inside the UV/LED Gel Nail Lamp. Make sure your thumb and all your fingers are relatively flat, or cure your thumb and fingers separately. 
  7. Curing options:
    • 10 seconds: Press the 10S button to cure small nail art designs, such as dots or lines for 10 seconds.
    • 30 seconds: Press the 30S button to cure large nail art designs, such as flowers or checkers.
    • 60 seconds: Press the 60S button to cure regular coats of Gel Nail Polish.
    • Smart timer: Place your hand inside the lamp to start the smart-timer. This is simply an alternative to pressing the pre-set buttons and stays on for up to 119 seconds. 
    • Low heat mode: Press the 99S low heat mode button to cure at 24W for 50 sec, then 48W for 50 sec. Use if you have sensitive nails, or experience heat spikes.

Tips & Tricks

Use compatible products

Use all Gelous products (Base Coat, Colour Coat, Top Coat, and Gel Nail Lamp) to ensure compatibility.

Careful preparation

Thoroughly buff, clean, and dehydrate your nails with Nail Polish Remover before application for ultimate adhesion.

Apply away from sun

Apply your Gel Nail Polish away from sunlight and your Gel Nail Lamp when turned on to avoid it curing on the brush.

Apply thinly

Apply your Gel Nail Polish in thin, even coats, leaving a gap between the Gel Nail Polish & cuticle to prevent lifting.

Avoid skin contact

Remove any Gel Nail Polish on your skin before curing to prevent reactions or allergies.

Use a strengthener

Use Builder Gel or Rubber Base Coat if your nails are weak or flaky.

Cap your coats

Cap every coat of Gel Nail Polish by running the brush horizontally over the free edge of your nail.

Practice aftercare

Avoid washing dishes or using cleaning products without gloves, and use Cuticle Oil daily.

FAQ's

If you are a new user of Gel Nail Polish, please don’t be disheartened if your first few manicures don’t last as long as expected. There are many tips and tricks to applying Gel Nail Polish that make the difference between a long-lasting application and an application that doesn’t last long enough (i.e. chips easily or peels). Often, new users of Gel Nail Polish make small mistakes during the application process that cause premature chipping or peeling. Once you've mastered your Gel Polish application, you'll enjoy flawless, long-lasting manicures time and time again. Practice really does make perfect!

Please be patient, read our Application Guide carefully, and take note of our tips and tricks.

  • Make sure you are using Gelous brand Base Coat, Colour Coat, Top Coat and Gel Nail Lamp. Gelous Gel Nail Polish and the Gelous UV/LED Gel Nail Lamp are designed to be totally compatible, with the UV/LED Gel Nail Lamp operating at 365-405nm and the Gel Polish curing within this wavelength. Though we use a reasonably generic curing wavelength, we do advise against using different polishes with our lamps, different lamps with our polish, or different brands polishes with our polish, as they may not be compatible. Incompatibility could result in under-curing which can cause serious damage to your hands or nails. 
  • Ensure your nails are strong enough for a gel manicure. If your nails are too weak, they can bend and cause the Gel Nail Polish to pull away from the nail. Nourish your nails with products such as Cuticle Oil, Moisturiser and Nail Defense to improve their strength, and consider adding a Builder Gel into your manicure routine.
  • Nail prep is very important and will directly influence the longevity of your mani or pedi. Before applying your Gel Nail Polish, gently buff the entire surface of each nail. Make sure to buff in one direction and remember, you are trying to rough up your nails not make them smooth, so the whole nail should appear dull from the buffing (not shiny). You need to be very thorough with the buffing, paying particular attention to the sides of the nails and around the cuticle, as this is where lifting may occur if not buffed correctly.
  • Make sure to clean your nails thoroughly after buffing, as any residual buffing dust, oil or other contaminants will reduce adhesion of the gel and affect the longevity. To clean, simply apply Nail Polish Remover to a Lint Free Wipe and thoroughly clean the surface of your nails, including the area under your nails and around the cuticles.
  • Use Nail Primer before your Base Coat to prime and dehydrate the nails.
  • Don’t apply your coats of Gel Nail Polish too thick and make sure they are an even thickness. Pay attention to the cuticles and the sides, as this is where Gel Polish can get thicker if you have too much Gel Nail Polish on the brush. To achieve a thin application, remove excess Gel Nail Polish from the brush by circling it around the inside of the bottle neck, pressing it off.
  • Cap every coat of Gel Nail Polish by running the brush horizontally over the free edge of your nail. View capping diagram here. If you have shorter nails, start each coat by using a Nail Art Brush or the tip of your bottle brush to cap the free edge.
  • When applying, start in the middle of the nail then ‘push’ the Gel Nail Polish gently towards the cuticle without it touching. It is important to leave a thin gap between the edge of the Gel Nail Polish and your cuticle when applying. If the Gel Nail Polish is applied to the cuticle, it can separate and lift as your nail plate grows. Aim to avoid getting any Gel Nail Polish on your skin or cuticle, however if you do, remove it with an Orangewood Cuticle Stick, Nail Art Brush or Lint Free Wipe before curing. 
  • In terms of aftercare, avoid washing dishes or using cleaning products without gloves, use Cuticle Oil regularly to help your nails looking fresh for longer, and if you get a snag, file this down so it does not catch and cause further damage.

You can find our full list of FAQ's here.

See the links below to find our YouTube tutorials.

Watch tutorials

Find out more

Search our shop