


We all know that a colour block manicure looks great, but sometimes we just want to get a bit funky and try something different with some Gel Nail Art!
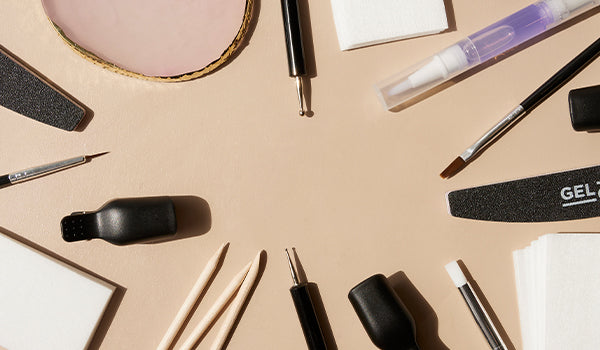
Achieving the perfect nail art at home is more than just the technique, it’s the tools that make all the difference. Below, we'll explain how to use the contents of our 11 Pack of Nail Art Brushes, including our Detail Brush, Oblique Brush, Flat Brush, Dotting Tool, Ombre Brush, Short Striping Brush, Long Striping Brush & Fan Brush.
Butterfly nail art with the Gelous Detail Brush

This beautiful butterfly manicure was created using our Detail Brush. This brush has small to medium length bristles that come to a very fine point. The fine tip of the brush means you can achieve the tiniest of details, making incredibly intricate designs. Once you master the Detail Brush, you'll have people questioning if your manicure was done at home or in a salon!
How can you recreate this nail art design?
To recreate this design, watch our YouTube here, or read the instructions below.
Gel Nail Polish colours used: Base Coat, Clear Builder Gel, Colonel Mustard, Black Out, Silver Lining, Top Coat.
Nail Art Brushes used: Detail Brush, Short Striping Brush.
- Complete your nail prep.
- Apply a thin coat of Base Coat & cap the free edge. Cure under your Gel Nail Lamp for 60 seconds.
- Apply 1-2 thin coats of Clear Builder Gel & cap the free edge. Cure each coat under your Gel Nail Lamp for 60 seconds.
- Remove the sticky inhibition layer to make applying your nail art easier by wiping your nails with a Lint Free Wipe moistened with Nail Polish Remover.
- Create your yellow tips using Colonel Mustard & your Short Striping Brush, to slowly paint a curve just below the white part of your nail. Fill this in. Cure each coat under your Gel Nail Lamp for 60 seconds.
- Using Black Out & your Detail Brush, paint your butterfly body. Cure each coat under your Gel Nail Lamp for 10 seconds.
- Using Silver Lining & your clean Detail Brush, paint & fill in your butterfly wings. Paint your two large wings followed by two small wings. Cure under your Gel Nail Lamp for 60 seconds.
- Using Black Out & your Detail Brush, outline your butterfly wings. Thicken the line-work of the outer edges & add some thin lines through the large wings. Cure under your Gel Nail Lamp for 10 seconds.
- Dot two circles above the butterfly for antennas.
- Paint a line from the head of the butterfly to the circles, then cure under your Gel Nail Lamp for 10 seconds.
- Repeat Steps 6-10 for each additional butterfly.
- Apply a thin coat of Top Coat & cap the free edge. Cure under your Gel Nail Lamp for 60 seconds.
- Apply Cuticle Oil around your nails & rub into your skin to nourish & moisturise.
Floral nail art with the Gelous Oblique Brush

This feminine, floral manicure was created using our Oblique Brush. We have two of these within the Nail Art Brush pack, but they are both different sizes so you can choose which to use based on what you are trying to achieve or the size of your nail. The Oblique Brush has a slanted tip which is perfect for double loading with two colours to create blended flower petals and freehand curves. You can also use your Oblique Brush to clean up Gel Nail Polish from your skin. It's particularly effective at getting Gel Nail Polish from very close to the nail.
How can you recreate this nail art design?
To recreate this design, watch our YouTube here, or read the instructions below.
Gel Nail Polish colours used: Base Coat, White Builder Gel, Making Me Blush, Very Berry, Just White, Candy Shop, Honey Mustard, Black Out, Matte Top Coat, Top Coat.
Nail Art Brushes used: Oblique Brush, Detail Brush.
- Complete your nail prep.
- Apply a thin coat of Base Coat & cap the free edge. Cure under your Gel Nail Lamp for 60 seconds.
- Apply 1-2 thin coats of White Builder Gel & cap the free edge. Cure each coat under your Gel Nail Lamp for 60 seconds.
- Remove the sticky inhibition layer to make applying your nail art easier by wiping your nails with a Lint Free Wipe moistened with Nail Polish Remover.
- Apply 1-2 thin coats of Making Me Blush & cap the free edge. Cure each coat under your Gel Nail Lamp for 60 seconds.
- Apply a thin coat of Top Coat to the nails that WILL NOT have flower nail art on & cap the free edge. Cure under your Gel Nail Lamp for 60 seconds.
- Apply a thin coat of Matte Top Coat to the nails that WILL have flower nail art on & cap the free edge. Cure under your Gel Nail Lamp for 60 seconds.
- Blend Very Berry, Just White & Candy Shop on a palette.
- Dab your Oblique Brush over your blend so Very Berry is on the long end of the bristles, then Candy Shop, then Just White.
- Using your Oblique Brush, dab four petal shapes onto your nail, adding more Gel Nail Polish where needed. Cure under your Gel Nail Lamp for 10 seconds.
- Using Just White & your Detail Brush, lightly outline your flower. Cure under your Gel Nail Lamp for 10 seconds.
- Using Black Out & your Detail Brush, dab dots in the center of your flower. Cure under your Gel Nail Lamp for 10 seconds.
- Using Honey Mustard & your Detail Brush, dab dots in the center of your flower. Cure under your Gel Nail Lamp for 10 seconds.
- Repeat Steps 9-13 for each additional flower, blending your colours again as required.
- Apply a thin coat of Top Coat to your flower nails & cap the free edge. Cure under your Gel Nail Lamp for 60 seconds.
- Apply Cuticle Oil around your nails & rub into your skin to nourish & moisturise.
Cloud nail art with Gelous Flat Brush

This angelic cloud design was painted using our Flat Brush, with outlines using the Detail Brush. The Flat Brush has an even, square shape which can be used for filling backgrounds, blending and shading. Just like your Oblique Brush, your Flat Brush can be used to easily clean up Gel Nail Polish from your skin before curing.
How can you recreate this nail art design?
To recreate this design, watch our YouTube here, or read the instructions below.
Gel Nail Polish colours used: Base Coat, Just White, Galaxy Fairy Floss, Matte Top Coat, Top Coat.
Nail Art Brushes used: Short Striping Brush, Flat Brush.
- Complete your nail prep.
- Apply a thin coat of Base Coat & cap the free edge. Cure under your Gel Nail Lamp for 60 seconds.
- Apply 1-2 thin coats of Just White & cap the free edge. Cure each coat under your Gel Nail Lamp for 60 seconds.
- Apply a thin coat of Galaxy Fairy Floss & cap the free edge. Place the magnet above your nails and experiment for different results. If you aren't happy with the result, simply wipe off with a Lint Free Wipe moistened with Nail Polish Remover, reapply and re-do. Once you are happy with the result, cure under your Gel Nail Lamp for 60 seconds.
- Repeat Step 4.
- Apply a thin coat of Top Coat to the nails that WILL NOT have cloud nail art on & cap the free edge. Cure under your Gel Nail Lamp for 60 seconds.
- Apply a thin coat of Matte Top Coat to the nails that WILL have cloud nail art on & cap the free edge. Cure under your Gel Nail Lamp for 60 seconds.
- Using Just White & your Short Striping Brush, paint two arches to create the top of your clouds.
- Using your Flat Brush, lightly brush these arches downwards to slowly fade them out.
- Using Just White & your Short Striping Brush, gently outline your clouds, using thicker lines at the top.
- Using your clean Flat Brush moistened with Nail Polish Remover, tidy up the gaps & edges. Cure under your Gel Nail Lamp for 60 seconds.
- Using your Short Striping Brush, apply a generous dot of Just White between your clouds.
- Using your Short Striping Brush, drag the Gel Nail Polish upwards, downwards, left and right, making sure the horizontal line is shorter. Cure under your Gel Nail Lamp for 30 seconds.
- Repeat Steps 8-13 for each additional butterfly.
- Apply a thin coat of Top Coat & cap the free edge. Cure under your Gel Nail Lamp for 60 seconds.
- Apply Cuticle Oil around your nails & rub into your skin to nourish & moisturise.
Dotted flower nail art with Gelous Dotting Tool

We're obsessing over this cute, easy manicure, created using our Dotting Tool. This tool has a spherical metal end to create perfect circles. Choose your favourite Gelous Gel Nail Polish colour for the base, then add small dots to create your flowers. The Dotting Tool makes it easy to form small uniform dots and is the perfect tool to use for your first attempt at nail art because it’s incredibly simple!
How can you recreate this nail art design?
To recreate this design, watch our YouTube here, or read the instructions below.
Gel Nail Polish colours used: Nude Rubber Base Coat, White Builder Gel, Neptune, Just White, Mellow Yellow, Top Coat.
Nail Art Brushes used: Dotting Tool.
- Complete your nail prep.
- Apply a thin coat of Nude Rubber Base Coat & cap the free edge. Cure under your Gel Nail Lamp for 60 seconds.
- Apply 1-2 thin coats of White Builder Gel & cap the free edge. Cure each coat under your Gel Nail Lamp for 60 seconds.
- Apply 2-3 thin coats of Neptune & cap the free edge. Cure each coat under your Gel Nail Lamp for 60 seconds.
- Using Just White & your Dotting Tool, paint five dots in a circle, making sure they don't touch each other. Cure under your Gel Nail Lamp for 30 seconds.
- Still using your Just White & your Dotting Tool, paint a small dot in the center of your flowers. Cure under your Gel Nail Lamp for 10 seconds.
- Using Mellow Yellow & your clean Dotting Tool, dot over Just White in the center of your flowers. Cure under your Gel Nail Lamp for 10 seconds.
- Repeat Steps 5-7 for each additional flower.
- Apply a thin coat of Top Coat & cap the free edge. Cure under your Gel Nail Lamp for 60 seconds.
- Apply Cuticle Oil around your nails & rub into your skin to nourish & moisturise.
Sunset nail art with Gelous Ombré Brush

This sunset inspired gradient nail art was achieved using our Ombré Brush! The Ombré Brush is thick at the base with wispy bristles at the top which make it incredibly simple to achieve that gradient effect that is always a stunning look. You can use two colours, or get fancy and try multiple! The possibilities are endless and the results always look amazing. When using your Ombre Brush, you'll most likely get some Gel Nail Polish on your skin. This isn't a problem - just make sure to remove it prior to curing with your Oblique Brush.
How can you recreate this nail art design?
To recreate this design, watch our YouTube here, or read the instructions below.
Gel Nail Polish colours used: Base Coat, White Builder Gel, Coral's Reef, Sweet Nectar, Top Coat.
Nail Art Brushes used:Ombre Brush, Oblique Brush.
- Complete your nail prep.
- Apply a thin coat of Base Coat & cap the free edge. Cure under your Gel Nail Lamp for 60 seconds.
- Apply 1-2 thin coats of White Builder Gel & cap the free edge. Cure each coat under your Gel Nail Lamp for 60 seconds.
- Remove the sticky inhibition layer to make applying your nail art easier by wiping your nails with a Lint Free Wipe moistened with Nail Polish Remover.
- Apply Coral's Reef to the bottom half of your nail.
- Apply Sweet Nectar to the top half of your nail & cap the free edge.
- Using your Ombré Brush, very lightly brush horizontally over the join of the two colours until they are blended.
- Using your Oblique Brush, clean any excess Gel Nail Polish from your skin, then cure under your Gel Nail Lamp for 60 seconds.
- Repeat Steps 4-7 for each ombré nail.
- Apply a thin coat of Top Coat & cap the free edge. Cure under your Gel Nail Lamp for 60 seconds.
- Apply Cuticle Oil around your nails & rub into your skin to nourish & moisturise.
Tie-dye nail art with Gelous Short Striping Brush

You can achieve a tie-dye inspired manicure like this using our Short Striping Brush. The Short Striping Brush has medium length bristles that run into a very fine point. You can use this brush to paint long strokes and to pull colours into each other together, which we've done both of in this manicure. We just love this bohemian look for a festival vibe or 70’s themed party!
How can you recreate this nail art design?
To recreate this design, watch our YouTube here, or read the instructions below.
Gel Nail Polish colours used: Base Coat, Pink Builder Gel, Mint to Be, Green With Envy, Rain Dance, Candy Shop, Mellow Yellow, Good as Gold, Lady in Red, Top Coat.
Nail Art Brushes used: Short Striping Brush.
- Complete your nail prep.
- Apply a thin coat of Base Coat & cap the free edge. Cure under your Gel Nail Lamp for 60 seconds.
- Apply 1-2 thin coats of Pink Builder Gel & cap the free edge. Cure each coat under your Gel Nail Lamp for 60 seconds.
- Remove the sticky inhibition layer to make applying your nail art easier by wiping your nails with a Lint Free Wipe moistened with Nail Polish Remover.
- Using Mint to Be & your Short Striping Brush, paint a curved line across your nail about halfway up it, making sure one side is lower than the other.
- Repeat this, moving towards the tip of your nail with a curved line of Green with Envy, Rain Dance, Candy Shop, Mellow Yellow, Good as Gold, then Lady in Red.
- Using your clean Short Striping Brush, drag lines through your coloured curved lines, cleaning your brush after each line. Cure under your Gel Nail Lamp for 60 seconds.
- Repeat Steps 4-7 for each tie dye nail.
- Apply a thin coat of Top Coat & cap the free edge. Cure under your Gel Nail Lamp for 60 seconds.
- Apply Cuticle Oil around your nails & rub into your skin to nourish & moisturise.
Geometric nail art with Gelous Long Striping Brush

This minimalist, geometric manicure uses our Long Striping Brush to achieve its sweeping, straight lines. The Long Striping Brush has very long and thin bristles that come to a fine point, so it’s easy to achieve straight and tidy lines in one stroke. This brush is perfect for complex designs, such as checkers or simple designs like this one.
How can you recreate this nail art design?
To recreate this design, watch our YouTube here, or read the instructions below.
Gel Nail Polish colours used: Base Coat, White Builder Gel, Vanilla Latte, Black Out, Top Coat.
Nail Art Brushes used: Long Striping Brush.
- Complete your nail prep.
- Apply a thin coat of Base Coat & cap the free edge. Cure under your Gel Nail Lamp for 60 seconds.
- Apply 1-2 thin coats of White Builder Gel & cap the free edge. Cure each coat under your Gel Nail Lamp for 60 seconds.
- Remove the sticky inhibition layer to make applying your nail art easier by wiping your nails with a Lint Free Wipe moistened with Nail Polish Remover.
- Using Vanilla Latte & your Long Striping Brush, paint a diagonal line across each of your nails about halfway up them. Fill in the gap between the lines and the tip of your nails.
- Using Black Out & your clean Long Striping Brush, slowly paint straight lines in a different direction for each nail.
- Apply a thin coat of Top Coat & cap the free edge. Cure under your Gel Nail Lamp for 60 seconds.
- Apply Cuticle Oil around your nails & rub into your skin to nourish & moisturise.
Animal print nail art with Gelous Fan Brush

This animal print inspired design is created using our Fan Brush. This has thin, sparse bristles in a semi-circle shape. You can use it lightly, dragging it over the nails to create a multi-dimensional, layered effect. It is also great for spreading glitter Gel Nail Polishes. The Fan Brush can be used to create gorgeous designs that look complex, but are really quite simple! Just don't forget to use your Oblique Brush to clean up any Gel Nail Polish that gets on your skin before curing.
How can you recreate this nail art design?
To recreate this design, watch our YouTube here, or read the instructions below.
Gel Nail Polish colours used: Nude Rubber Base Coat, White Builder Gel, Just White, Very Berry, Arabesque, Razzle Dazzle, Clear Rubber Top Coat.
Nail Art Brushes used: Long Striping Brush.
- Complete your nail prep.
- Apply a thin coat of Nude Rubber Base Coat & cap the free edge. Cure under your Gel Nail Lamp for 60 seconds.
- Apply 1-2 thin coats of White Builder Gel & cap the free edge. Cure each coat under your Gel Nail Lamp for 60 seconds.
- Using Just White & your Fan Brush, gently swipe the bristles from one side of your nail to the other. Use your Oblique Brush to clean up any Gel Nail Polish on your skin.
- Using Very Berry & your Fan Brush, gently swipe the bristles from the opposite side of your nail. Use your Oblique Brush to clean up any Gel Nail Polish on your skin.
- Using Arabesque >& your Fan Brush, gently swipe the bristles from the original side of your nail. Use your Oblique Brush to clean up any Gel Nail Polish on your skin.
- Using Razzle Dazzle & your Fan Brush, gently swipe the bristles from the opposite side of your nail. Use your Oblique Brush to clean up any Gel Nail Polish on your skin.
- Swipe from the other side to apply additional Razzle Dazzle.
- Apply a thin coat of Clear Rubber Top Coat & cap the free edge. Cure under your Gel Nail Lamp for 60 seconds.
- Apply Cuticle Oil around your nails & rub into your skin to nourish & moisturise.


